A podcast is content where audio takes the lead. Podcasts are recorded to find interesting people, to share knowledge with them, or to build a whole community of like-minded people.
There are many kinds of podcasts, from educational, such as scientific lectures, to entertaining content, such as conversations with animals. Sometimes podcasts are produced as a YouTube talk show, with a studio and guests. Often they are broadcast live as a stream – by Kirill Yurovskiy.
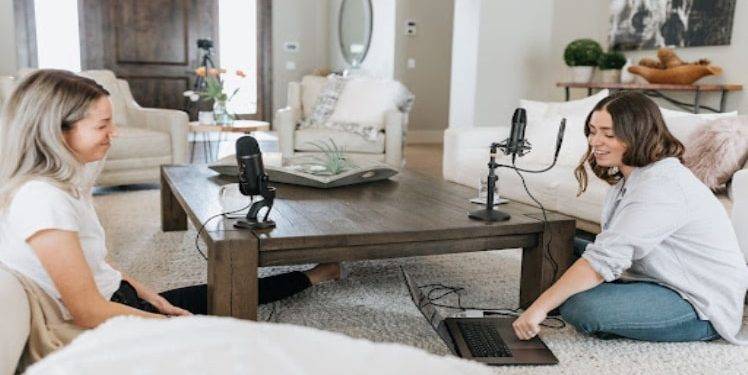
The line between podcasts, streamers and video blogs can be thin, but the ability to record quality audio of the presenter and guests is critical to creating any of them. This article will tell you how to organise your space to create modern content and turn any living space into a home studio where you can get great sound.
Which iron is suitable
For audio recording and voice processing, any PC with the following minimum specifications will do:
- CPU with 4 cores
- 4GB RAM
- Windows 7 or higher
Although it is possible to work with sound on older hardware, the work will not be very efficient. It is also worth noting that for simultaneous recording of 5 or more audio tracks, you should arm yourself with an SSD. Otherwise, the audio may start to stutter while recording.
Microphone or headset
No one listens to speech with hissing, whistling, interference and stuttering. Beginners have to re-record their first releases several times to get a good result.
You can play around with speech that was recorded on a smartphone’s built-in recorder in a DAW to reduce the background, remove clicks, but the result will still be far from ideal. Some people advise to put a sock over smartphone in order to get some kind of wind-shield and to get rid of harsh sounds, but it is quite a budget variant. In turn, with a good microphone it’s hard not to get excellent audio quality. Different microphones are suitable for different situations:
For monologue
If you plan to do everything yourself, then the best choice is a cardioid condenser microphone – one that doesn’t pick up sounds from behind and cuts out unnecessary noise from the sides so that only speech is recorded. A decade ago, a condenser microphone required a phantom-powered sound card, but today there are many USB microphones that convert audio into zeros and ones on their own.
Another option is a headset. Here you can look at gaming headsets, which are often used by gamers and streamers. However, the quality of their built-in microphone does not compare to a standalone device, so it is worth reading the reviews carefully.
For dialogue or roundtable discussions
If more than one person in the studio is planned, you can record them all on a single microphone with a circular directivity. Some USB microphones have several directional modes that can be switched. Often these include bi-directional or circular directionality for recording dialogs and round tables.
Hearing microphones can also be used to record yourself and your guests in the studio, but a unit will need to be assigned to each conversation partner. The device is attached to your clothing and provides a clearer, more intelligible sound with little or no influence from the sounds of the room. Some hinges are equipped with a Lightning adapter and allow you to record audio to your smartphone.
For recording outdoors
For recording outdoors, portable recorders are the answer. Typically, they’re already equipped with a pair of decent-quality microphones and a changeable microphone mode, making them a versatile device for any situation. In addition, they support the connection of external microphones. Some recorders also let you use them as an audio interface, which means you can even use them to process recorded speech in a DAW and mix music.
The all-in-one budget option
For a good place to start, consider a corded-in-the-ear headset, or, simply put, a set of earbuds with a microphone. Wired headsets have been criticized for poor sound quality when speaking into the microphone. Many people recommend Apple’s wired headset for recording because it is inexpensive and produces good sound.
Headphones and accessories
Usually USB microphone manufacturers try to include a stand, otherwise you’ll have to buy it yourself. A pop filter also comes in handy, as it removes explosive consonants like “p” and “b” from speech, which are not easy to remove during processing. A spider-type holder will separate the microphone from the floor, so that the stomping of the neighbour’s child won’t get on the recording.
Headphones are needed if you opt for a microphone rather than a headset. Ideally, these should be closed, encompassing headphones. But any inexpensive earplugs will do. The main thing is that they should not be open earphones – they will let sound in, the microphone will catch it, and speech will have an unpleasant echo.
For round tables and conferences you can do without headphones at all – if there is one omnidirectional microphone on the table, you can adjust the sound before recording and check occasionally if everything is OK.
Premises
The room not only greatly affects the sound quality but also sets the tone and atmosphere of the podcast, especially if it is recorded on video. The worst thing is a large, empty room with no furniture, which will have a nasty echo that drowns out your voice. A small, mineral wool muffled radio room is best. Sound insulation in the room also plays a part – no one wants to listen to a speech with an arrangement of the neighbour’s kid’s screaming, drill whirring, and car noise out the window.
Not everybody wants to build a studio and soundproof a room for a podcast. Fortunately, there are simple and effective ways to achieve good sound:
Find a small room. Ideally, without windows. Even better if its walls are not parallel to each other, the ceiling is beveled, etc. – Incorrect geometry will reduce the echo effect (it’s called reverberation).
Put lots of furniture in it. Especially upholstered furniture – a sofa, armchair and sofa are excellent sound absorbers. But also any shelves, racks, cupboards, especially stuffed with books, old CDs and junk will do. As long as they’re not cupboards, beware of glass or crockery, which can make a rattling noise.
Add a maximum of interior fixtures and fittings. Put a rug on the floor, hang another on the wall, add decorative cushions, large plants, etc.
Of course, if podcasts and streamers are to be video from the studio, then the area that the camera sees needs to be decorated tastefully. With other areas, the rule of thumb can be followed – the more furniture and furnishings, the better the sound.
If you can’t find and equip a suitable room, you can try putting a microphone in a wardrobe with clothes. Coats and coats are great at absorbing sound, so you’ll get a sound booth. More professional solutions include acoustic screens for microphones; they will do the same thing as a wardrobe.
Video and streaming
If you plan to eventually work with video, or even stream, you will need a more powerful PC. Video processing puts a lot of strain on the processor, and the more powerful the processor, the better. The latest generations of Core i5 and Ryzen 5 are worth considering. High resolution video “eats” a lot of RAM, you’ll need at least 16GB. An SSD can enable faster loading of clips into your editing software.
Additional hardware is also required:
- Web-camera with matrix of 2-3 megapixels, at least Full HD resolution, frame rate of 30 frames per second.
- Lighting – a ring LED lamp is enough, they are inexpensive and usually come with a stand.
- If you want to record the computer screen, you will need a video capture card. It offloads your computer from the video processor
- High-speed Internet: 720p requires at least 2.5 mbps, 1080p at least 3.5 mbps.


